
|
|
|
|
|
|
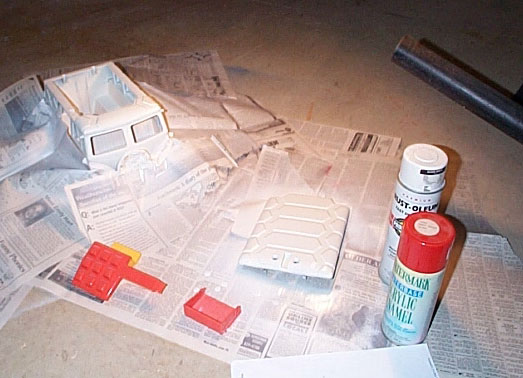
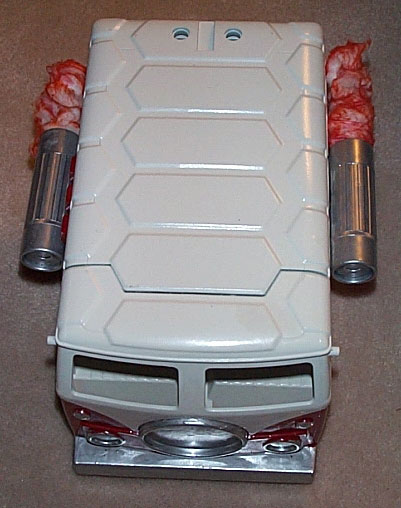
How to build this baby: To start, you need an old out of production Teenage Mutant Ninga Turtle Van from the late 80's/early 90's. This toy, will be the van itself. For the rockets, I used a pair of disassembled binoculars. Don't take apart your nice expensive ones, these were little cheapies from the dollar store or something. You will also need a can of red spray paint, a can of white spray paint, and a little bottle of silver paint. To start building, remove all the stickers on the van, mine had about 19,000, so I'm gonna bet yours does too. They can be pealed of with fingers and water (takes way to long and they never come all the way off) or you can take them of with rubbing alcohol (at least I'm told, I used my fingers. DOH!)
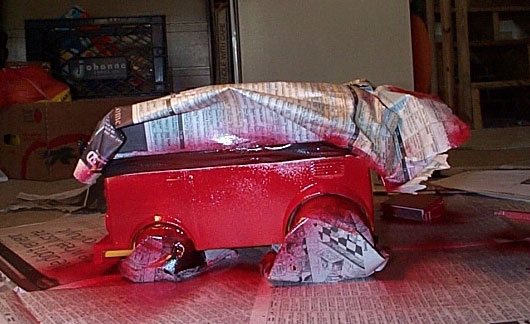
After this is done, you will be ready to paint.
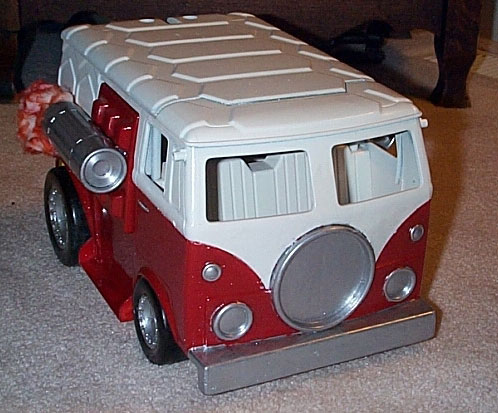
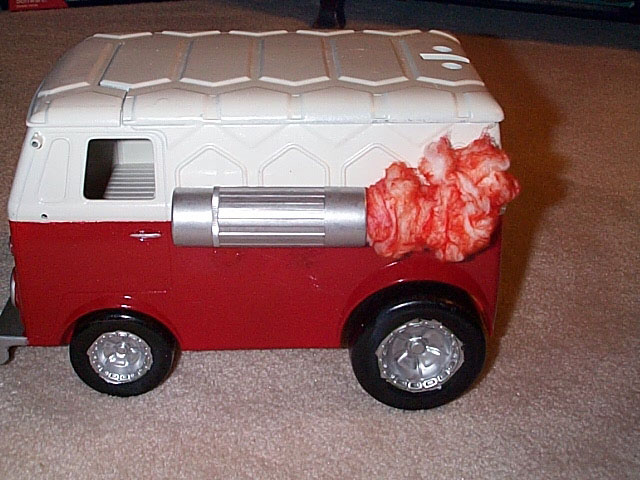
The hardest part of the ship was the silver detail paint. It had to go in many places, and it was very fine tuned. As a result, you can't use spray paint, brush paint is necessary. Among other things, I paint the door handles, exhaust grates, and headlights silver. Believe me, take your time! I put 2 coats on all of the silver parts. After this is all done, perform any spot jobs with paint (Such as paint over places where the silver bled) and you are ready to glue. We will now be gluing the rockets to the side of the ship. I originally planned on placing them in the back, but to make it more "official" looking, I elected to place them in the middle of the ship. If you elect to place them in the middle, you will need to cut 3 of the notched segments off of the swinging door. This is not that difficult. Unscrew the back plate on the door, and pry it off. (There is a little piece of plastic that still connects them after you unscrew the 2 pieces. This piece will break.) Cut the 3 segments off with an exacto knife as close to the main face of the door as possible so the door will fit snug. In order to make sure there would be no holes in the ship, place a segment of electrical tape over the back of the door and paint it red. Oops, guess we weren't ready to glue, now we are. Ok, you will need to line up the rockets so they look right, so do the one on the swinging door first. Place it so it covers as much of the painted electrical tape as possible, but not up so far as it covers the passenger seat door. Hot glue it into place. You are going to have to eye up the other rocket so it looks right. This isn't overly difficult, but it takes a few minutes. Once you have it set, glue it into place. I used markers to color cotton balls orange and glued them to the back of the rockets to make the ship look as though it was more functional, but this is not necessary. There, done, whaddya think? Now all you need is a Mini Pearl.
- Jeff Zehnder Jr. 4/13/2000, #95033
| ||||||||

Go Back Home
Design and Layout © 2022 Kjo 2000 Graphics
Mystery Science Theater 3000 is © 1989 - 2016 Best Brains, Inc.
Mystery Science Theater 3000 is © 2017 - 2022 Satellite of Love LLC
Contact Us