|
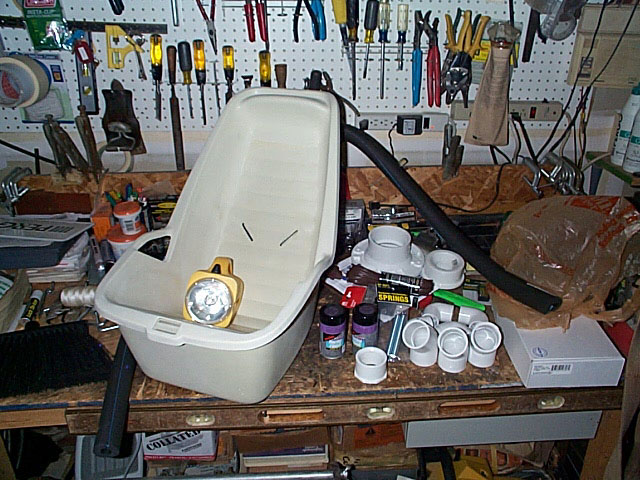
1. Take the carseat and remove the 4 plastic rivets that hold the 2 sections together.
Now remove the cushion thing and the straps, also tear off the big label on the bottom.
You need to clean the seat (20 years of baby puke... yay), I soaked it overnight in Spic and Span and rubbed off the remaining glue and such with steel wool.
 2. After this is done and you have dried the seat, you will cut the bottom lip to the appropriate size.
Basically, you lop off the bottom part of the inner liner to fit it into the larger part of the seat. See the visual aid.
I cut the piece off at about 1 inch above the visible lip portion.
I did this so that if I managed to screw up drilling the hole for the jaw, that I had some extra material to work with.
(I took this picture after I had completed Gypsy, as I forgot to take it beforehand, but it works all the same.)
2. After this is done and you have dried the seat, you will cut the bottom lip to the appropriate size.
Basically, you lop off the bottom part of the inner liner to fit it into the larger part of the seat. See the visual aid.
I cut the piece off at about 1 inch above the visible lip portion.
I did this so that if I managed to screw up drilling the hole for the jaw, that I had some extra material to work with.
(I took this picture after I had completed Gypsy, as I forgot to take it beforehand, but it works all the same.)
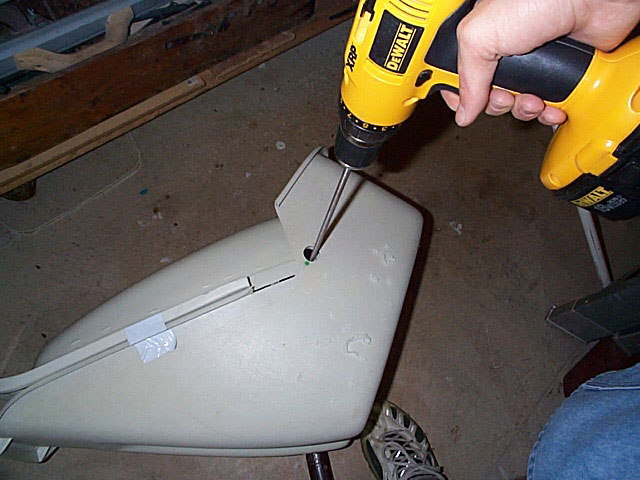
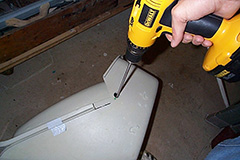 3. Fit the 2 seat halves together the way they will sit when Gypsy is assembled, and bore a 5/8" hole through all 4 sections of the plastic.
Duct tape the two halves into place while you drill.
These holes have to all be in perfect alignment, as you will run an 18 3/4" length of ˝" PVC through them as the hinge for Gypsy's lower jaw.
Temporarily fit the PVC pipe through the holes to make sure it all lines up, if it does, great, if not, you just wasted an 80 dollar relic.
3. Fit the 2 seat halves together the way they will sit when Gypsy is assembled, and bore a 5/8" hole through all 4 sections of the plastic.
Duct tape the two halves into place while you drill.
These holes have to all be in perfect alignment, as you will run an 18 3/4" length of ˝" PVC through them as the hinge for Gypsy's lower jaw.
Temporarily fit the PVC pipe through the holes to make sure it all lines up, if it does, great, if not, you just wasted an 80 dollar relic.
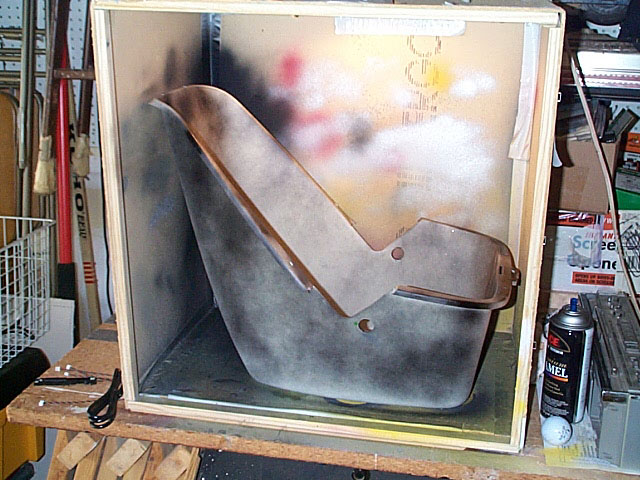
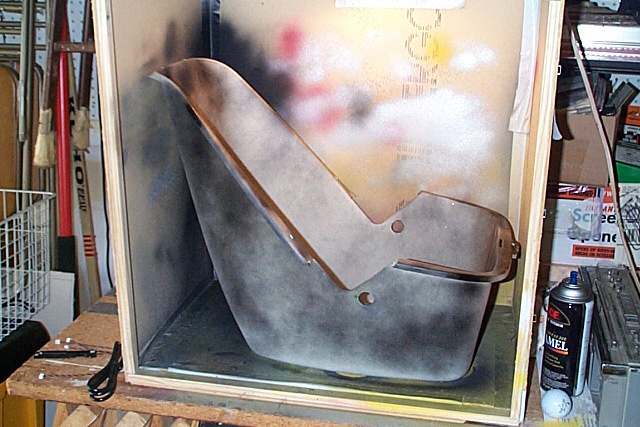 4. With that hole drilled, it is time to paint.
Prime Gypsy first!
I used black, but honestly, I think a gray primer would look better and you would need less paint.
Coat the outside of the seat and the flashlight with the primer and let dry.
Now paint the inside portion of the seat (Top and Bottom halves) flat black.
Even though you're priming, still remember to use light coats.
Any runs that you have in the primer coat will show through to the final coat!
4. With that hole drilled, it is time to paint.
Prime Gypsy first!
I used black, but honestly, I think a gray primer would look better and you would need less paint.
Coat the outside of the seat and the flashlight with the primer and let dry.
Now paint the inside portion of the seat (Top and Bottom halves) flat black.
Even though you're priming, still remember to use light coats.
Any runs that you have in the primer coat will show through to the final coat!
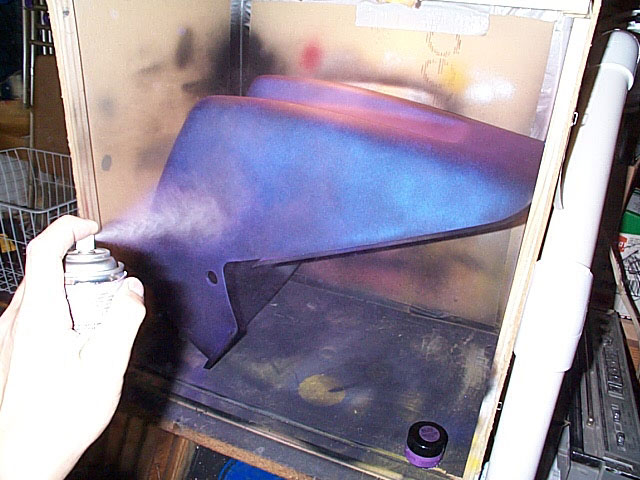
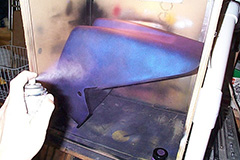 5. When everything is dry, start lightly coating the outside of the pieces in Pactra Pearl Purple.
And by lightly coating, I mean lightly coating.
Testor's paint is specifically engineered to be runny, so the lighter the coats, the better.
The paint is absolutely noxious, so do it in a well ventilated place.
I went through 6 cans of paint, but that was due in part to the black primer.
5. When everything is dry, start lightly coating the outside of the pieces in Pactra Pearl Purple.
And by lightly coating, I mean lightly coating.
Testor's paint is specifically engineered to be runny, so the lighter the coats, the better.
The paint is absolutely noxious, so do it in a well ventilated place.
I went through 6 cans of paint, but that was due in part to the black primer.
6. While the paint is drying, you can create Gypsy's skeleton.
Essentially every website on the entire internet, usenet, mirc, and old gopher nodes give different measurements on how long to make the PVC sections.
This site is no exception!
In viewing episodes and backstage photos, I have come up with dimensions I think accurately reflect BBI's Gypsy.
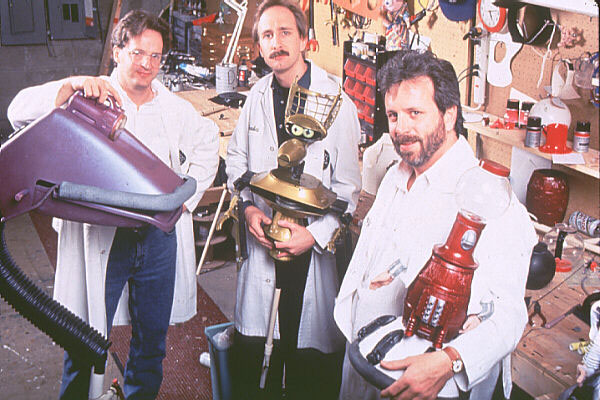
My primary source picture is this, where Jim has his arm rested on Gypsy, which would suggests she is less than 6 feet tall.
With that in mind, I began cutting.
 The top 2 pieces are both 6 inches long and connected with a 45 degree PVC connector.
The top piece connects to a 2" reducer that fits into the closet flange.
If you're not sure what a closet flange is, it's an overpriced hunk of PVC that you fit the bottom of your toilet into and will be on the same aisle as the rest of the PVC at Home Depot.
The top 2 pieces are both 6 inches long and connected with a 45 degree PVC connector.
The top piece connects to a 2" reducer that fits into the closet flange.
If you're not sure what a closet flange is, it's an overpriced hunk of PVC that you fit the bottom of your toilet into and will be on the same aisle as the rest of the PVC at Home Depot.
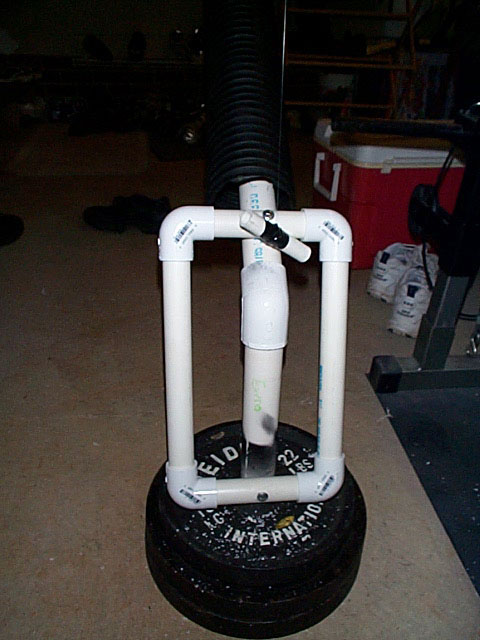
The long PVC piece is 2 feet long and attached to the upper two pieces with a 45 degree connector.
One more PVC piece is cut for the base support and connected to another 45 degree connector off the long piece.
It is the base, and can be any length you like. Mine was 13 inches long.
Fitted together, the pieces should form a rough "S" shape.
I painted the closet flange flat black as most of it remains visible when everything is fitted together.
I also painted my drain tubing flat black, as it had a yellow line and some text on most of it. A light dusting will do, and the paint will not be even the least bit obvious and will still cover nicely.
Most people use PVC cement to hold the PVC in place (it will twist and contort at the joints if you do not secure it).
I had some leftover cement from a household sprinkler system project, but if I did not, PVC cement is overpriced and not worth it.
A much cheaper solution is to drive a screw through the connectors into the PVC itself.
Also, my black drain tubing did not need to be secured on Gypsy.
I cut it to the exact length needed to stretch from the closet flange down to the handlebars and just ran it over top of the PVC.
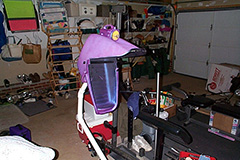
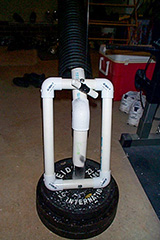 7. While paint is still drying you can create the "Handlebars" used to hold Gypsy.
These will differ from bot to bot, depending on your own preferences, but I built them from 1" PVC cut in a rectangle shape and attached with 90 degree PVC connectors.
The lengths of the pieces I used are 6" and 13."
I mounted the handlebars 2" above the bottom 45 connector for the PVC skeleton.
I mount them here to help cut down some on the unwieldiness of Gypsy.
To mount them, tape the handle bars in place and drill one of the holes. Put two bolts all the way through (this will require at least a 5 inch bolt) and secure it with lock nuts.
7. While paint is still drying you can create the "Handlebars" used to hold Gypsy.
These will differ from bot to bot, depending on your own preferences, but I built them from 1" PVC cut in a rectangle shape and attached with 90 degree PVC connectors.
The lengths of the pieces I used are 6" and 13."
I mounted the handlebars 2" above the bottom 45 connector for the PVC skeleton.
I mount them here to help cut down some on the unwieldiness of Gypsy.
To mount them, tape the handle bars in place and drill one of the holes. Put two bolts all the way through (this will require at least a 5 inch bolt) and secure it with lock nuts.
8. Now that everything is dry, you need to attach the flashlight to the car seat. This is fairly easy.
Temporarily tape the light to the location on Gypsy where you would prefer it sits.
Drill holes from the inside of Gypsy through the seat and flashlight and secure it with some screws.
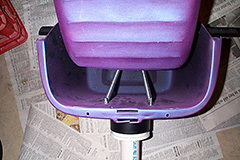
9. At this point you can attach the lower and upper jaw pieces.
To attach the springs to the lower jaw, drill 2 small holes evenly spaced from the center of the back side of the seat about ˝" from the edge.
Through these holes the springs will be attached.
Line up lower and upper jaw pieces and slide the 18 3/4" piece of PVC through the holes. Attach the springs, and Gypsy's jaw will hold in place just as it should.
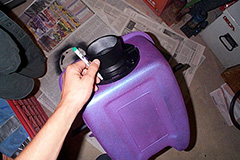 10. To mount the PVC skeleton, to Gypsy, you have to attach the closet flange to the back part of the (relative) front of the carseat.
Center the flange on the front of the carseat, and mark 4 holes to be drilled.
Drill the holes, and mount the flange on Gypsy with 4 bolts and lock nuts. (Use lock nuts, you wouldn't want Gypsy to fall on you while you're operating her, now would you?
10. To mount the PVC skeleton, to Gypsy, you have to attach the closet flange to the back part of the (relative) front of the carseat.
Center the flange on the front of the carseat, and mark 4 holes to be drilled.
Drill the holes, and mount the flange on Gypsy with 4 bolts and lock nuts. (Use lock nuts, you wouldn't want Gypsy to fall on you while you're operating her, now would you?
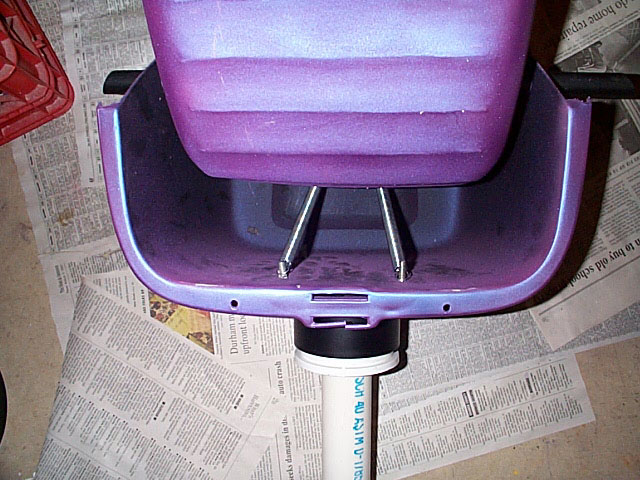
 11.
I attached the springs that will hold the lower jaw into place when Gypsy is fully operational to the same bolts that hold the flange on.
As the illustration shows, I simply pushed the end of the spring through the bolt and attached the nut on top of everything. (The nuts were not in place in the photograph.)
I was forced to use 2 springs, the springs I used simply were not strong enough to do the job with one spring.
It can however, be done with one with strong enough spring, but what that means is you have to drill an extra hole that is centered on Gypsy so the jaw opens evenly.
11.
I attached the springs that will hold the lower jaw into place when Gypsy is fully operational to the same bolts that hold the flange on.
As the illustration shows, I simply pushed the end of the spring through the bolt and attached the nut on top of everything. (The nuts were not in place in the photograph.)
I was forced to use 2 springs, the springs I used simply were not strong enough to do the job with one spring.
It can however, be done with one with strong enough spring, but what that means is you have to drill an extra hole that is centered on Gypsy so the jaw opens evenly.
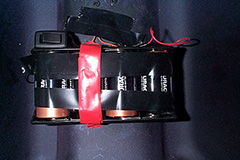 12. We've got one more really important step now, wiring.
The wiring is the least fun and most annoying part of Gypsy.
I simplified mine by putting the switch and battery pack on the roof of Gypsy's mouth, rather than running the switch all the way down the PVC to the handles.
Connect the wiring from the light through the flashlight, down through a hole and connect the switch and battery pack together.
Mine is soldered, but wirenuts work just as well.
If you can find it, a fully enclosed battery pack works best in this situation, as it will hold the batteries in place while you are operating Gypsy.
I could not find one, and as a result, the batteries on my Gypsy are held in with lots of tape.
12. We've got one more really important step now, wiring.
The wiring is the least fun and most annoying part of Gypsy.
I simplified mine by putting the switch and battery pack on the roof of Gypsy's mouth, rather than running the switch all the way down the PVC to the handles.
Connect the wiring from the light through the flashlight, down through a hole and connect the switch and battery pack together.
Mine is soldered, but wirenuts work just as well.
If you can find it, a fully enclosed battery pack works best in this situation, as it will hold the batteries in place while you are operating Gypsy.
I could not find one, and as a result, the batteries on my Gypsy are held in with lots of tape.
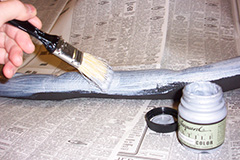 13. There are just a few other finishing touches.
Take your lip flexible foam insulation and put it on Gypsy.
If you were lucky enough to find the right shade of gray foam, just attach it.
If not, purchase some silver or gray fabric paint.
I bought mine at A.C. Moore. It will probably take about half-a-dozen coats to fully cover the black foam.
13. There are just a few other finishing touches.
Take your lip flexible foam insulation and put it on Gypsy.
If you were lucky enough to find the right shade of gray foam, just attach it.
If not, purchase some silver or gray fabric paint.
I bought mine at A.C. Moore. It will probably take about half-a-dozen coats to fully cover the black foam.
The paint will not adhere very well to the foam while drying.
If you are painting on newspaper and the lip dries to it, more than likely the paint will peel off.
To avoid this, take a length of PVC pipe and wrap the insulation around it.
Mount it in a vice, or anywhere that the lip can be suspended while it dries.
This will save you the immense hassle that I faced of repainting small sections of the lip because paint peeled off.
 14. Gypsy's eye is another small issue.
It is somewhat of a mystery as to how BBI exactly made Gypsy's eye yellow.
Over the years, I've seen people try a whole host of different methods to pull off the coloring the BBI did.
Of course, you could make a season one Gypsy and not use a light at all, but anyway.
My method to color Gypsy's eye to the right shade of yellow was to take a piece of yellow tissue paper, cut it to the appropriate size, and place it on the inside of the flashlight lens.
It looks excellent when the light is on.
14. Gypsy's eye is another small issue.
It is somewhat of a mystery as to how BBI exactly made Gypsy's eye yellow.
Over the years, I've seen people try a whole host of different methods to pull off the coloring the BBI did.
Of course, you could make a season one Gypsy and not use a light at all, but anyway.
My method to color Gypsy's eye to the right shade of yellow was to take a piece of yellow tissue paper, cut it to the appropriate size, and place it on the inside of the flashlight lens.
It looks excellent when the light is on.
 15. If you haven't already done so, now is the time to attach Gypsy's mouth articulation control mechanism (a large piece of fishing wire).
Drill a small hole towards the front of the lower jaw piece. Run a piece of fishing line through the hole and secure it on the inside of Gypsy's mouth (I tied a small washer around it).
At the other end of the line we will use the patented BBI method, taping the end of the string to a hunk of PVC!
It worked for them for 10 years, and can work for you too.
Cut a piece of ˝" PVC situated to a comfortable size for holding, and tape the fishing line to it.
15. If you haven't already done so, now is the time to attach Gypsy's mouth articulation control mechanism (a large piece of fishing wire).
Drill a small hole towards the front of the lower jaw piece. Run a piece of fishing line through the hole and secure it on the inside of Gypsy's mouth (I tied a small washer around it).
At the other end of the line we will use the patented BBI method, taping the end of the string to a hunk of PVC!
It worked for them for 10 years, and can work for you too.
Cut a piece of ˝" PVC situated to a comfortable size for holding, and tape the fishing line to it.
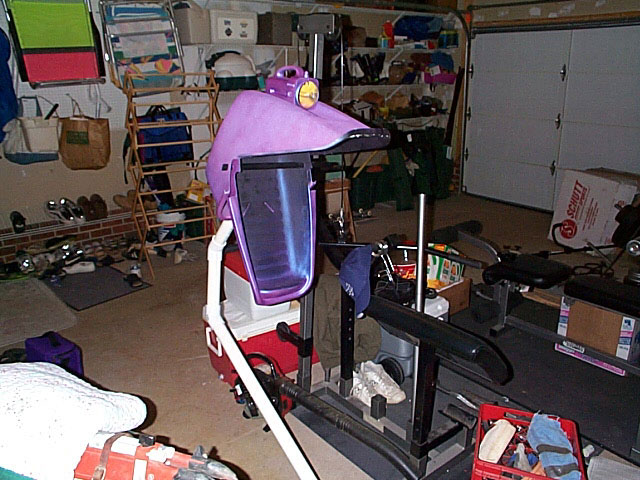
16. Gypsy is complete!
Practice your best falsetto voice and enjoy!
|
Assorted Gypsy Pics!
|

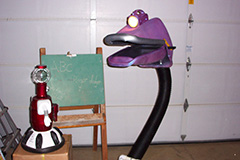
Gypsy's excited about getting a ram chip for a good thing and a bad thing about the movie.
|

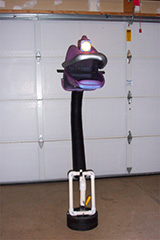
Gypsy pondering the nature of the universe.
|
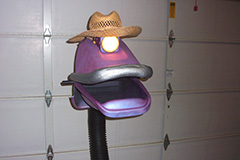
Gypsy preparing change the plutonium rods in the nuclear bowels deep inside the reactor of the ship, or something like that.
|

Gypsy and Tom posing for the camera.
|
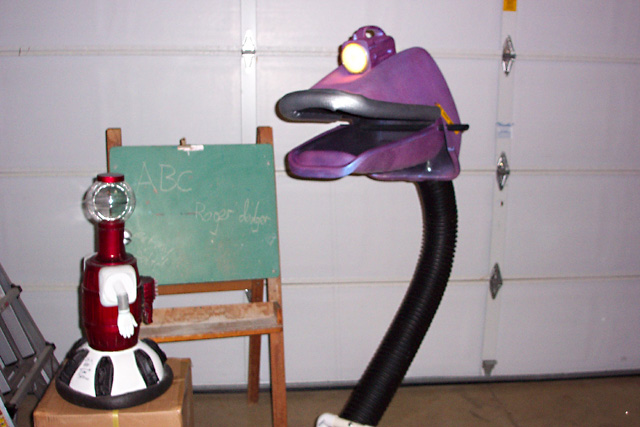
Gypsy attempting to teach Tom fractions.
|
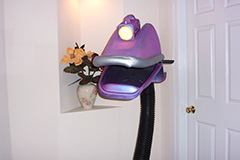
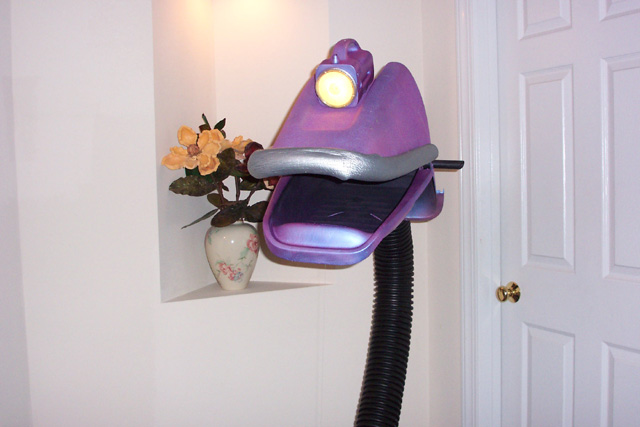
Gypsy enjoying a quiet moment with some vacuflowers.
|
Go Home
| 


