
Special Notes: No one truly knows exactly how to build this thing. This is my best guess. For many years, the biggest mystery was what the main part of the console came from. The rumor was an "80's Mac printer", but no one was ever able to find it. I used a paint tray to make mine. But a bot part trader finally figured it out: the desk console was a Pollenex Pure Air 799 Humidifier. They pop up on eBay from time to time. Do not build this if you do not have experience with electrical work. You will hurt yourself! | |||
|
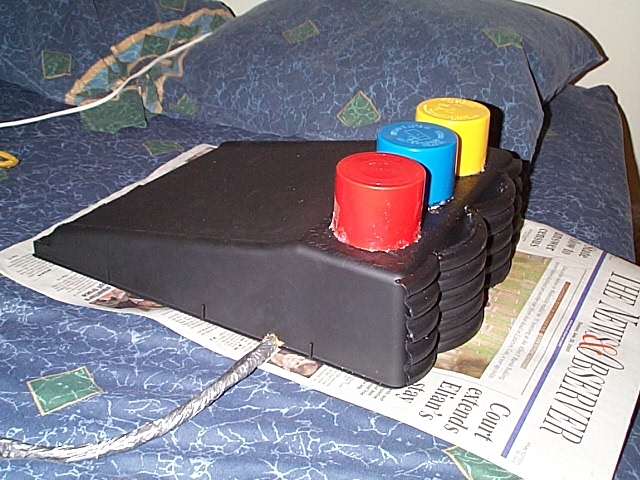
Alrighty then, let's get started. So, you ran to your local Home Depot and spend $30 on parts. You get home, the first thing you need to do is turn your paint tray upside down and cut off the support that keeps it level when it is right side up. This can be done with shrub pruners. You can do it with an exacto knife, and you'll get a cleaner cut, but it will take a year and a half. After you're done cutting the leveler thing off, cut 3 holes in the top flat section of the paint tray, this will be where the bulbs poke through. Now drill a hole in the side by the bottom of the console, you will run the electrical wiring through this hole. Now lay down newspaper so you don't get your garage all dirty and paint the paint tray black. (The irony is striking.) Do it in numerous light coats. I cannot stress this enough. When the paint is dry, you can hot glue in the 4 segments of gypsy tube that make up the front of the panel. Its mostly guess work, just trimming bits and pieces off until it looks right. In between coats of paint, you can set to work with the wiring. You are going to need to mount the light sockets inside the console so they stay in place, I used a 2X4 cut to the width of main paint tray. The average light socket is about an inch and a half in diameter, so your going to need to bore 3 holes an inch and a half wide in the wood. Make sure the spacing in the wood is the same as it is in the paint tray. When this is done, get out your glue gun and your light bulb holders. Push the bulb holders into the holes and glue them into place.
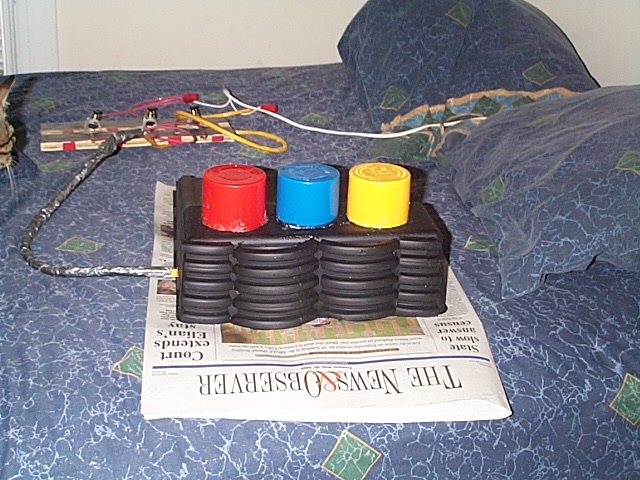
I mounted my switches onto a segment of plywood, so they would be easier to operate, and so I wouldn't shock myself. I actually mounted them with wire ties that I ran through holes I drilled into the wood because there was no other way that I could tell to do it. After you have mounted all the electrical stuff, place the light bulbs in the light bulb holders and plug in the cord. Test the connection by pushing the buttons, if everything works, you're go for gluing the 2X4 into the paint tray, if not, go back and check your connections and try again. To glue the 2X4 in, dry fit it to make sure it fits, and if everything is good, apply hot glue to the ends of the wood and set it in place. Make sure that the bulbs align with the holes in the paint tray. They should stick through a little bit. We are now go for the spray can tops. Remove any stickers from the tops and glue them in place. The order for mine was Red, Blue, and Yellow, although depending on the version of the panel you did, they could be in various orders with various colors. I would recommend taping down loose wiring so it doesn't fly around everywhere. I wrapped the wire that ran from the panel to the switches in duck tape so it stayed together. At this point, if everything works, you are done.
- Jeff Zehnder Jr. 4/21/2000, #95033
| |||||


Go Back Home
Design and Layout © 2022 Kjo 2000 Graphics
Mystery Science Theater 3000 is © 1989 - 2016 Best Brains, Inc.
Mystery Science Theater 3000 is © 2017 - 2022 Satellite of Love LLC
Contact Us